Monday, 7 April 2014

FINAL PRODUCTS


In what way does your media product use, develop or challenge forms and conventions of real media products? 

How does your media product present social groups?

What kind of media institution might distribute your media product and why?

Who would be the audience for your media product?

How did you attract/address your audience?

What have you learnt about technologies from the process of constructing this product?

Looking back at your preliminary task, what do you feel you have learnt in the progression from it to the full product?

Q7 - Looking back at your preliminary task, what do you feel you have learnt in the progression from it to the full product?

*GONE BACK AND ADDED MORE DETAIL 03/04/2015*


This is a table of what conventions were on my college magazine and which were on my music magazine. It is clear to see the development from the first task to now, as I hardly had any of the conventions of a genuine magazine on the college one. I didn't really have a colour scheme, and I didn't have any feature stories or a realistic looking plug, etc.

--------------------------------------------------------------------------------------------------------------------------
BELOW IS THE NEW EVALUATION OF QUESTION 7, THE ABOVE WILL BE DELETED ONCE THE BELOW ONE HAS BEEN CHECKED FOR IMPROVEMENTS. 


The first thing I ever did was create a LIIAR analysis of an existing Kerrang magazine front cover, in order to begin to understand conventions of real media products:

I was able to pick out the main image of the cover and say that the high up angle was useful, because you usually expect to see medium close up of artists or bands on covers, but having an usual angle draws attention. In addition to this, I began to pick out key bits of terminology such as feature stories, mast head and plugs, to show the conventions of real magazines, that I'd have to use in mine in order for my product to look realistic.

For my preliminary task I was asked to create a front cover of a college magazine, which was in preparation for my final product. I started by creating a small mood board on what kind of images I'd expect to see on the front cover of a college magazine, which can be seen below:


I took these images from the Wyke College flikr account, and began to understand what kinds of shots are common to use - medium close ups. The majority of these images show students holding up folders, or items related to the course they are studying, which I took into consideration when creating the preliminary task magazine cover.

Then I decided on the font I'd use on the front of the college magazine, and went with 'PERPETUA TITLING MT', and used it for both the title and the subtitle on the cover.

I then created a digital mock up of my front cover, which can be seen below:


This was useful to create, because it got me to think about the key features of a front cover, which can be seen - the title of the magazine, the name of the issue, the date and price of the issue, a plug and a barcode. Obviously later on I understood that a cover had to be filled more than this, but as this was the first thing I had ever made on Photoshop, at that point in time I thought it was average.

After creating my digital mock up, I took pictures using a borrowed college camera, of the people I was going to put on the front cover of my magazine. And then after taking my potential pictures and uploading them onto my blog, I created my college magazine front cover.


I thought that in comparison to the mockup, I had created a semi-professional looking product (at that point in time). I thought that I had taken into consideration the images I found on the Wyke flikr account, and had taken an image similar, with my model holding up a folder to show she has notes on her academic studies. I had never used Photoshop before and so creating this on it felt like a big deal, and I felt like anything I did was successful, as I was so amateur at it. I created a 'splat' type object on top of the folder my model was holding, with the words 'exam worries' on it. I thought this would be relevant, as the first thing I and many others I know think of when they think of A Levels, are exams. I thought of this when creating the plug to the right of the folder '10 funniest exam answers' as it lightens up the mood of the exam worries, as the reader can have a joke at where others went wrong in their exams. I also followed other conventions, such as the plug on the left in the circle 'the latest college fashion!' and the chance to win tickets to Leeds Festival. I thought at the time that the barcode, date of issue and price looked realistic in relation to the placement.

This was then my full product:


Looking back at the preliminary college magazine task and my full product music magazine task, it is clear I have learnt a lot in terms of developing skills. The college magazine task was the first time that I had properly used Photoshop, and I could not get the hang of how to do things such as changing the brightness and contrast, or even how to make the text look bold by outlining it.

This can be seen through the title and subtitle of my college magazine:

Looking back on this now I can see where I could have improved, especially on the subtitle 'A GUIDE TO REVISION'. At the time I was thinking I should only outline the title 'ACADEMIC NEWS' as it had to stand out more than the rest of the text, however, I understand now that unless the subtitle is zoomed in like this, it really is not that easy to read or understand.

This can also be seen through the plug on the left of my college magazine:

I can clearly see on this one that I could have easily improved. I could have improved by making the 'WIN!' bolder and in a larger font than the rest of the text with it, because even thought it is in capitals where the other text is not, it still does not stand out as much as it should do. In addition to this, the 'tickets' is not clearly visible to see, as there is someone stood right behind it, and like the above, it can only be really read clearly when zoomed in like this.

A final way in which I could have improved on the text on my preliminary task, is this:

One thing that clearly stands out on this zoomed in image, is the fact that you cannot clearly see the date of issue. 'February 2014' is fine, but the '1st' is very unclear, unless zoomed in like this. This is because the model's coat or tshirt was in the background, and so white on white clearly does not work.

I understand all of these problems with the preliminary task now after undergoing the full task and seeing how crucial it is to make sure that the text is really visible for the reader, which is one of the many things that I have learnt in the progression from it to the full product, as in my full product it is clear to see that I have used a black outline on all of the white text, for example:

I have made sure that I did not make the same mistake again on the full product, I made sure I outlined the white text with a bold black stroke, so it all of the white text is visible all over the magazine.

I also created a small table as a tick list to see if I had used the key features of a magazine on both the preliminary task and the full product:

This table shows that all of the key conventions I had picked out that I thought were very important. Even from looking at that quick check list it is clear to see I had missed out on common connotations of magazine front covers, for example I missed out on a clear main story, which is what will obviously attract the consumer in to buying the product.

I am glad that I looked back on the college magazine front cover before creating my proper music magazine front cover, as it meant that I knew where I went wrong and what I could do to make sure that I either did not use the same technique as I used on the college magazine, or I did use that technique but developed it to make sure my full product looked professional and not as a part of my coursework. By looking back on the college magazine and created this check list, meant that I knew that I needed to add a main story on the front of my music magazine and also a plug, and to stick to a colour scheme which was particularly important on the music magazine, as I had to create a contents page and a double page spread too, and by making sure I stuck to a specific colour scheme, it showed continuity between the three products, and made them seem part of the same magazine.

Q6 - What have you learnt about technologies from the process of constructing this product?

When starting this course, I had little/no knowledge of how to make a magazine, as I did nothing to do with media at GCSE. Other people on the course had done media or photography at GCSE and so I felt nervous to start, however we did a Photoshop workshop at the beginning of the year which I felt benefitted me a lot as I learnt some of the basics to make a college magazine. 


When I first used photoshop I found it really difficult to get the hang of, especially because it was on an Apple Mac and I had never used one before. I found the different layers confusing and found making effects look realistic very hard. Eventually when learning what all the layers were it became handy because if something didn't look right I could just delete the layer and start again rather than delete the whole thing and start again.  


This year was the first time I had ever used an Apple Mac and so trying to adjust to it was very difficult.  Eventually I got used to it and could work everything on it properly.

When I did not have media lessons I had to try and use Photoshop on other computers such as a Dell desktop computer in my college library because the Macs were being used. I found it difficult adjusting to how different the software was on the different computers, but usually did my work on the Macs and the research on the Dells. 


 Using blogger to keep all of my media work on was handy because it meant that I had another source of backing up my work. In addition to this, Blogger meant that I could check my work and adjust it on anything such as a phone, iPad or laptop. I found the official Blogger app on the iTunes app store which was a benefit to me because I could add comments on my work on-the-go. 


I used polaroin.com to add small polaroid-looking images on my double page spread to add a vintage feel to my magazine. I found it easy to use because all I had to do was upload an image and tick a box if I wanted a certain effect on my image, and it created it by itself. I saved them and then added them to my double page spread. 


I used Microsoft Word to create the interview for my double page spread because it was easy to use and I could use spell check on that to make sure that the interview was grammatically correct. After this I copy and pasted it to my double page spread which was open on Photoshop.


I used prezi.com to create slideshow videos of my work. I used prezi to show LIIAR analysis' of different music magazines. I found it beneficial to use because they looked more interesting than just uploading images of Powerpoints.


I used GoAnimate to create an animated video to show which genre of music my magazine was going to be. 
--------------------------------------------------------------------------------------------------------------------------EVALUATION ABOVE WILL BE DELETED WHEN THE BELOW HAS BEEN CHECKED. 

When I started AS Media Studies I had little knowledge on how to make a magazine, as I did nothing specifically related to any of the technology used this year, at GCSE. Other people in my class had done either Media or Photography at GCSE which stood them in good stead when it came to creating the product, and so I felt a bit intimidated. My intimidation was relieved almost at the beginning of the year when we did a lot of work on Photoshop creating a small task, which was to create perfume advert, and although looking back now it was very bad, I felt it benefited me a lot as I learnt some of the basics on how to make the college magazine front cover. The college magazine was the second transition task, that was there for us to get used to creating a magazine, ready for creating our real music magazines.


AS Media Studies was the first time I had ever used an Apple Mac computer, and so the first couple of coursework lessons I was trying to adjust to using the Apple software rather than Windows software, and it took me a while to get used to it. For example using simple things such as Word or PowerPoint felt different, due to the different layout of it all. One of the confusing things at first for me was how to even minimise the things I was on, because I had to get used to it looking like a traffic light system – red, yellow and green buttons for minimising and expanding, etc. instead of the ‘x’ and the ‘_’  for this. Eventually, I got used to using the Apple Macs and found them very useful to use when dealing with software such as Photoshop. 


Photoshop was the editing software that I used to edit all of my images on, to construct my final product. When I first used it I found it really difficult to get the hang of due to never having any previous experience on the software before. I found the different layers confusing and found making effects look realistic, a very hard task. Eventually when learning what all the layers were it became handy because if something did not look right, I could easily just delete the layer and start that layer again rather than delete the whole thing and start from scratch.

I edited the images of my artist on the front cover of my music magazine, and all of the other images on the contents page and double page spread, on Photoshop.


By editing the 'Levels' on my images it meant that I could manipulate the brightness of the photos. For example above, I turned up the brightness of the image of my artist so that his face stood out more, and I added another layer to focus on the print on his t-shirt. I turned the brightness down on this because it bared no relevance to the magazine, and I did not want it to draw attention from the text underneath the artist, telling the consumer about the main story on the double page spread.

When I did not have media lessons, I had to try and work on other computers. I usually used computers such as the one seen above, to work on my coursework in my college's library. I found it difficult adjusting to using software such as Photoshop on the Dell's, because I had only just gotten used to using it for the first time on an Apple Mac, and then I was having to work out how to use it on a Dell computer. In the end, I usually decided to do my actual coursework creating the product on the Macs in the media classroom, and used the Dell's in the library for my planning and research, and to write under screenshots during the production of my work.


Using blogger during the production of my AS Media coursework was useful and handy, as it meant that I had another source of backing up my work. I could do this by uploading the production of my product as I was creating it, so that I could see where I could improve and what else I had left to do. In addition to this, by using a website such as blogger allowed me to show my thought process  especially during the research and planning stages of my preliminary coursework. In addition to this, Blogger meant that I could check my work and adjust it on anything such as my phone, iPad, laptop or computer. I found the official Blogger app on the app stores on both my Sony Xperia Z3 smartphone, and my Apple iPad, which was a benefit to me because I could add commentary on any work I had uploaded, without worrying about going to my next lesson or rushing to do my work on the library computers, I could do my work on-the-go. A final point on the benefit of using Blogger during my preliminary porfolio, was the fact that it was used as a platform to upload and display all of my other work that I had created on sites such as Prezi and GoAnimate, which will be discussed further down this evaluation question.

I used 'polaroin,com' to add small polaroid-esque images onto my double page spread. I did this because I wanted to add a vintage feel to my magazine, and by using a digital polaroid picture, gave the page more depth and made it more eye-catching for the consumer. I found this website easy to use, as all I had to do was upload the image I had chosen to use, and tick a box if I wanted a certain effect on my image, and it processed my demand and created the polaroid picture. I then saved them as a JPEG, opened them up on Photoshop and decided which ones I wanted to copy and paste onto my double page spread.


Above shows a screenshot of the Polaroid images I created, that I chose to use on my double page spread. I added these onto my double page spread on Photoshop, and then added a dark outer layer to make them stand out. I did this because the background of the main image I used on my double page spread was quite dark at the bottom where I wanted to place my polaroid images, and therefore by creating a darker outline for them, they'd stand out more. I also chose a font that I had not previously used on the other parts of my preliminary portfolio production, and so by using this handwriting kind of text, it would also make these images stand out more than they would if they did not have any text alongside them.

I used Microsoft Word to create the interview for my double page spread. I wanted to make the interview look realistic, and so I created a plan on what I could write in this fictional interview, and using Microsoft Word was very useful for this. I created it on there because it was easy to use, as I was used to it after having to use it to write many essays over the years for homework for each subject, and as well as that it allowed me to use spell check to make sure that my interview was grammatically correct. After creating the interview, I copied and pasted it onto my double page spread which was open on Photoshop, and altered the sizing to make it fit onto the page.

I used 'prezi.com' to create slideshows of my work. They were useful in displaying my work without just typing out blog posts and writing a long paragraph or essay, or a PowerPoint uploaded as images, it meant that I could upload my presentation in a entertaining style, meaning that you can flip through different sections of my work. I used Prezi, for example, to show LIIAR analysis' of different music magazines, as can be seen below:


This shows how Prezi can be used, and uploaded easily onto Blogger, as all I needed to do was embed the code of my Prezi slide onto the HTML section of the blog post, and it would embed onto the post.
It can be seen from above that using Prezi meant that I had a entertaining and more interesting way of uploading my research, planning and thought process of my preliminary portfolio.

GoAnimate was used in the process of constructing my product, as I used it during the research and planning stages of my coursework. I used this website, as it is used to create and distribute animated videos. It allows users to develop both narrative videos, in which characters speak with lip-sync, and move around, and video presentations in which a voice-over narrative speaks over images and props. I used mine to show which genre of music I was going to focus on, in relation to the music magazine I was about to create. I decided to focus on the indie genre, which can be seen through my GoAnimate below:

music mag genre by meg gore on GoAnimate

This shows again, another way of uploading my work onto Blogger, without just typing it out in a post. By using sites like this, shows how I can use different media technologies accurately within my work, making it fun to look at, and more likely to be able to stick to, if I set it out in an exciting way. 

Q5 - How did you attract/address your audience?

I started off by creating an audience media pack, which would show the typical reader statistics, which can be seen below:

Above was my audience media pack that I created after researching other magazine's audience media packs. Like stated in a post about it previously, I found that some media packs, but not all, dedicated a paragraph to an individual who reads their magazine, which gives a brief detail about them. I researched the typical age range and gender of the people who were most likely to read magazines within the indie genre, and found that it was a higher male percentage of readers, over the age of 20.

After creating this media pack, I knew that my target audience would be mainly the young male population, however, I was not going to alienate potential female readers. I decided to stick to a genderless colour scheme on my music magazine, by using mainly red, blue and yellow, which are not really specifically seen as either gender colours.


This shows how I tried to stick to a genderless colour scheme, as I did not really add either male or female stereotyped colours, I stuck to ones which would attract both the young male and female population of indie music magazine readers.

I thought it was important to put in a plug on the cover of my music magazine, that would attract in the target audience and a potential new audience. I decided to create one that gave a free poster and the chance to win tickets to Miles Kane's world tour. This could be attractive to a consumer who likes the indie genre, as Miles Kane is very much an up and coming artist, who has received great publicity recently due to being close and personal friends with Alex Turner, the leader of Arctic Monkeys (another indie band).

I asked three different people who took a particular interest in the indie folk genre, what they thought of my products with the following questions:

1) What genre do you think my music magazine is?

2) What do you think is eye-catching about the cover/contents page/double page spread?

3) If you could change something about the magazine what would it be?

4) Is the colour scheme continued successfully through all of my products?

I uploaded my findings onto three different GoAnimates, which can be seen below:

Interview with Charlotte by meg gore on GoAnimate
1) "What genre do you think my music magazine is?" "I think it is indie."
2) "What do you think is eye catching about the cover?" "I love the plug on the bottom left."
3) "If you could change something about the magazine, what would it be?" "I'd have a black background on the contents page."
4) "Is the colour scheme continued successfully through all of my products?" "Yes the red, blue and yellow colour scheme is continued throughout your media products."

Interview with Hannah by meg gore on GoAnimate
1) "What genre do you think my music magazine is?" "I think it is an indie magazine."
2) "What do you think is eye catching about the double page spread?" "I think the polaroid pictures are eye catching on the double page."
3) "If you could change something about the magazine, what would it be?" "I would make all of the images of the main artist have a vintage effect."
4) "Is the colour scheme continued successfully through all of my products?" "Yes, the colour scheme never changes on your media products."

  Interview with Bryn by meg gore on GoAnimate

1) "What genre do you think my music magazine is?" "Indie."
2) "What do you think is eye catching about the contents page?" "I like the layout of the images, it looks like a vintage newspaper."
3) If you could change something about the magazine, what would it be?" "I would change the filter on the image on the double page."
4) "Is the colour scheme continued successfully through my products?" "Yes it is."


By looking back at what the three participants said in response to my questions, I was glad that they all recognised the genre that I was trying to copy the conventions from, as this was important for it to look like a realistic and professional music magazine. In addition to this, I was also happy that the three participants were all able to tell me something that they thought were eye catching on all three of my products; the cover, contents page and double page spread.

Q4 - Who would be the audience for your media product?


-------------------------------------UPDATED VERSION BELOW----------------------------------------------

I began to work out who my target audience would be for my indie music magazine, by looking at existing indie magazines, and their audience media packs. An audience media pack shows the percentage of male to female ratio of consumers of the magazine, which class they are most likely to be in, and the age range of people who purchase the magazine. I decided to look at both NME and Q's audience media packs, and based my own on theirs, as my target audience was more than likely going to fit theirs, as they were both part of the indie genre. Both of their magazines had a higher proportion of male readers, over the age of 20, and so I based my audience media pack on these findings.

Above is the audience media pack that I created, which showed the key statics of the target audience of my music magazine, and the media product that I have produced. I also produced a brief paragraph about an individual reader of my media product, who would be similar to lots and lots of other readers of my media product; a young male, university student, music lover and a gig-goer. I think this is reflected in my product, as I have a plug in the bottom left hand corner which shows how the audience can win tickets to a live gig during Miles Kane's world tour.

In addition to this, I also added two images onto my contents page that I had taken of The Strypes and Arctic Monkeys at Earl's Court in London. I did this because like stated above, I would expect my target audience for my media product to be the kind that would enjoy going to gigs and festivals, and so by having images of these on my product, they would be able to relate to it more and therefore would want to read about these gigs.

I also asked my friend Hannah, an avid listener of the indie genre, to answer some questions, as I felt like although she broke some of the conventions of my typical target audience, she would most likely be the typical female consumer of my product, as it can be seen in a previous post on NME's audience media pack, that they still had a 37% female audience.

Below is my interview with Hannah:


I asked Hannah:

1) "How old are you?"
2) "Who are your three favourite artists or bands?" 
3) "How many gigs or concerts have you been to this year?" 
4) "Are you planning to go to any festivals this year?" 
5) "On average how many magazines do you buy each month?" 
6) "On which website do you listen to music the most?" 
7) "Where do you find new or unusual artists?" 

She answered:

1) 17.
2) Jake Bugg, Oasis and Arctic Monkeys.
3) 3.
4) Leeds Festival.
5) 1.
6) YouTube.
7) Twitter.

This shows how I am not only targeting the young male population, as there are females who also like the indie genre, and would potentially want to buy my music magazine as it would cater for their musical taste.

Overall, I believe that the audience for my media product would mainly be the young male population of indie music listeners, usually from the ages of 20 and over. However, I have made sure that the female population of indie music listeners do not feel alienated and feel like they could not read my music magazine. I made sure this was not the case by adding in information about a young female indie artist on the contents page, who female readers may feel like they can relate to.

Q3 - What kind of media institution might distribute your media product and why?


-----------------------------------------UPDATED VERSION BELOW----------------------------------------------


Q2 - How does your media product present social groups?


UPDATED VERSION BELOW: 

When designing my media product, at first I believed that I wanted to target the young male population of indie music fans, however, I realised that the best way of making my magazine popular would be to also target a female audience. I felt like there was a gap in the market for a new indie music magazine that focused on live performances, and chances to win free tickets to gigs and festivals. From my own personal music taste, I like all sorts of indie music and sub genres such as indie folk, and so I wanted to make my music magazine open to all types of indie music, which can be seen on the contents page with middle aged artists becoming a hit in the industry, and young female up and coming artists. I felt like it was good to portray a range of different ages for my artists, to allow any one to read the magazine and listen to the music.


This was my fictional artist that I used on the cover of my indie music magazine, '6 STRINGS'. I chose this person for the cover of my magazine as he liked this genre the most, therefore the way he dressed reflected this.


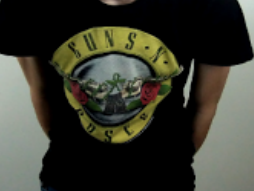
I chose to use the 'GUNS N' ROSES' t-shirt on the artist because wearing GUNS N' ROSES t-shirts, Nirvana t-shirts, etc. have become a fashion icon in recent years, and can be seen by different artists wearing other artists clothing.

This shows the popularity of band merchandise in modern society, with different versions of GUNS N' ROSES t-shirts easily available in different fashion shops such as House of Fraser, and even sports shops such as SportsDirect.


I chose for my artist to wear black skinny jeans, as it would be relatable to the clothing that my target audience would be. It can be seen that black skinny jeans are popular amongst 'indie' people and that fashion area.

This shows how my media product presents my target audience as young and almost rebellious to the older generation. For example I would not expect a middle aged working class man to be sat reading my indie magazine, as it just would not fit with their ideology. I would expect to see young males and females, with a passion for music, to be reading my magazine. Again, this is reinforced by the fact that even my artist is wearing a different band's merchandise, because youth culture has become so obsessed with the media and music, that it becomes a part of their every day life, not just by listening to it.